Thursday, May 31, 2012

Baked Baby Back Ribs + Sweet Potato Skewers

Glad you swung in to check out the third new recipe I am testing this week! Today I am trying my hand at baked baby back ribs! I am also preparing a side of grilled sweet potato skewers!! Following is the recipe, along with a few snap shots of the "process" I should call it, of making great ribs!!


***

Kim’s Oven-Baked Ribs


*Note: when working with baby back ribs, the silver skin will need to be removed. Here is a great visual tutorial to help simplify the process (it’s not hard, I promise!). Also, take note that the ribs need to be refrigerated with the rub prior to cooking for 8 to 48 hours so plan ahead!
*Makes 2 slabs ribs

INGREDIENTS:
2 whole slabs pork baby back ribs, silver skin removed
The Dry Rub
1-2 cups of BBQ sauce

Dry Rub: Prepared Tuesday evening & placed in tupperware bowl until Wednesday afternoon. 
8 tablespoons light brown sugar, tightly packed
2 tablespoons kosher salt (Morton’s brand – other brands may vary in strength)
1 tablespoon chili powder
1/2 teaspoon ground black pepper
1/2 teaspoon cayenne pepper (left out, did not have on hand)
1/2 teaspoon smoked paprika or regular paprika (regular)
1/2 teaspoon Old Bay seasoning
1/2 teaspoon dried thyme
1/2 teaspoon onion powder (left out, did not have on hand)
1/2 teaspoon garlic powder

My Rub!


DIRECTIONS:
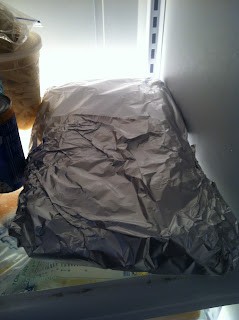
In a bowl, combine all dry ingredients and mix well. Place each slab of baby back ribs on a piece of heavy-duty aluminum foil or a double layer of regular tin foil, shiny side down. Sprinkle each side of the ribs generously with the dry rub. Pat the dry rub into the meat. Wrap the ribs tightly in the foil and refrigerate the ribs for a minimum of 8 hours or overnight and up to 48 hours.

Sorry for the blurriness; action shots never turn out like you want!


Ribs refrigerated with rub on from Wednesday afternoon (3:30ish) until Thursday afternoon @ 3:00pm, when I then placed them in the oven! 

When ready to bake the ribs, preheat oven to 250 degrees F.

Place the ribs (still in the foil packets) on a foil lined baking sheet and bake the ribs in the oven for 2 1/2 hours-3 hours or until tender when picked up with tongs. The meat will come easily off of the bone!


Remove ribs from foil and place on another foil lined baking sheet. Brush with your favorite BBQ sauce and broil until charred and bubbly.


I used one whole bottle of BBQ sauce, but how much you use if optional!

 Alternately, you can grill the ribs at this point, if you like, but sometimes they are falling off the bone and are so tender that it is a little difficult. Cut the ribs into individual portions (2-3 ribs per person). Serve with additional BBQ sauce.


Grilled Sweet Potato Skewers

INGREDIENTS:
4(3) medium sweet potatoes/yams, peeled and cut into 1-inch chunks
Olive oil
Salt and pepper
Bamboo skewers

DIRECTIONS:
Place all of the sweet potato chunks in a large microwaveable bowl. Cover with plastic wrap and microwave for three minutes. Remove from the microwave, stir, recover with plastic wrap and microwave 2-3 minutes more, until the sweet potatoes are just tender enough to thread on skewers (but not overly soft – they will cook through on the grill).

Thread 5-6 pieces of sweet potato on each skewer. Place all the skewers on a rimmed baking sheet and drizzle with 1-2 tablespoons of olive oil, rolling the skewers back and forth to evenly distribute the oil. Sprinkle the skewers with salt and pepper.

Preheat a charcoal or gas grill to medium or medium-high heat. Grill the sweet potato skewers, flipping every 5-6 minutes, for a total of about 20 minutes, until the sweet potatoes are tender. If desired, finish the hot sweet potatoes off with a quick brush of olive oil mixed with a little salt.


Serve immediately.


Recipe from Mel @ Mel's Kitchen Cafe


***


How bout them ribs? Are ya jealous?!? :) Happy eating!♥


Well this meal wraps up my three days of 100% new entrees! I have to say I was beyond pleased with all of them! I have to give a big thanks to Mel @ Mel's Kitchen Cafe for her amazing recipes. If you've never been to her recipe, you must go check it out, you won't be disappointed! 


Current Crush: Pink Camo Case

My current crush? My new pinkkkkk real tree camouflage otterbox! My other otterbox started to look a tad dingy. I figured with summer approaching, there couldn't be a better time to get a new case!

Would you like to protect your iPhone with this snazzy case? Buy it here

After my precious iPhone went through two tragic accidents in my last defender series otterbox, being dropped in the mud then ran over by my fourwheeler, & falling in the toilet, and still not being messed up the slightest bit... I would never ever buy any other phone case except a defender series otter box! You cannot beat service it provides so I was happy to pay the price for another!


This happens to be my second weekly post linking up with Danielle from Framed Frosting! She is hosting a weekly link up and the vibe is you just post about your "current crush" for the week! Go link up and join the fun!


Wednesday, May 30, 2012

The Best Sloppy Joes

Okay guys, I must declare that Mel @ Mel's Kitchen Cafe has my heart! Her blog and recipes are to die for. The step by step walk through's make messing up almost impossible. Mel happens to be as sweet as her desserts! Be sure to check out her blog and recipes!!

Tonight's menu consists of Sloppy Joes with a side of corn on the cob! Sounds delicious, right??


INGREDIENTS:

2 tablespoons vegetable oil
2 onions, roughly chopped (1 onion, not a big fan)
2 ½ pounds ground beef (1.5 pounds, deer hamburger) *only cooking for 3 people
2 tablespoons tomato paste
2/3 cup smoky BBQ sauce (or whatever BBQ sauce is in your fridge)
½ cup ketchup
¼ cup Worcestershire sauce
¼ cup soy sauce
Freshly ground black pepper
8 to 12 potato rolls (regular hamburger buns)


Warning!!! I made a huge mess preparing this meal. Maybe it was just me? But, beware!!!! :)
*the only pictures i took were the final product, sorry!


DIRECTIONS:
Preheat oven to 300 degrees.
Heat the oil in a large skillet over medium heat. Add the onions and cook, stirring, until they start to turn translucent, about 4 minutes. Add the beef and cook, stirring and breaking up the meat, until it is finely crumbled, the liquid boils off and the meat begins to brown, about 10 minutes. Drain the grease off the meat and onions. Stir in the tomato paste, and keep stirring until the meat is coated. Add the BBQ sauce, ketchup, Worcestershire, soy sauce, and pepper, and bring to a boil. Cook until the sauce is slightly thickened, 4 to 5 minutes. You can make the sloppy joe meat up to 2 days in advance and reheat it over low heat or in the microwave.

Wrap the rolls in aluminum foil and warm in the oven for about 10 minutes. Serve the sloppy joes hot with the warmed rolls.


These sloppy joes were by far the best I have ever eaten!! I will for sure make this again, and again, and again!


This corn was a great compliment to my sloppy joes. I boiled them (3 cobs) for approx. 10 minutes, then put them on the grill (wrapped in tin foil with a generous amount of butter) for 10 minutes. Heavenly! 

Hope this recipe makes it on your table very soon! Have a happy Wednesday! 


Tuesday, May 29, 2012

Cheesy Skillet Chicken + Rice w/ Green Beans

Today marks the start on my quest to explore new virtues of food! After discovering several new recipes, I put together a three night menu of foods I had never cooked before. Tonight, Wednesday night, and Thursday night I will feature these new dishes here at A Dash of Southern! Along with the recipe, I will post a handful of photos, and my personnel review! Enjoy tonight's entree of Cheesy Skillet Chicken, served with rice and green beans!!


Recipe:

Cheesy Skillet Chicken and Rice with Green Beans
*Serves 4-6

INGREDIENTS:
4 boneless, skinless chicken breasts (about 1 1/2 pounds)
Salt and ground black pepper
2 tablespoons vegetable oil
1 medium onion, chopped  (1/2 an onion... not a huge fan!)
8 ounces white button mushrooms, brushed clean and quartered or sliced
4 medium garlic cloves, finely minced or pressed through a garlic press (did not add)
1 ½ cups long grain white rice
4 cups low-sodium chicken broth
½ pound frozen or fresh green beans
1 cup shredded sharp or extra-sharp cheddar cheese
½ cup shredded Parmesan cheese


DIRECTIONS:
Pat the chicken dry with paper towels and season liberally with salt and pepper. Heat the oil in a 12-inch nonstick skillet over medium heat until the oil is rippling and hot. Carefully lay each chicken breast in the skillet and cook until the chicken is well browned on the first side, about 3-4 minutes. Flip the chicken with a pair of tongs and let it brown on the second side, about 3 minutes. Remove the skillet from the heat and transfer the chicken to a plate and set aside. Drain all but about 1-2 tablespoons oil from the pan.


 Return the pan to medium heat. Add the onion, mushrooms, garlic and ½ teaspoon salt and cook, scraping the browned bits off the bottom and edges of the pan, until the mushrooms begin to soften and start to brown, about 6-8 minutes. Add the rice and continue to cook until the edges of the rice turn translucent, about 3 minutes. Add the broth and bring to a simmer. Add the chicken to the pan and cover, reduce the heat to low and cook until the chicken is no longer pink in the center and the rice is mostly cooked through, about 15 minutes.

Remove the chicken from the skillet again, brushing off any rice that sticks to the chicken back into the skillet. Cover the chicken with foil to keep warm. Stir the green beans into the skillet, stir the mixture well, cover and continue to cook on low until the beans and rice are tender, about 10 minutes. Stir in the cheese and season to taste with salt and pepper. Serve immediately.


**To be honest, I love love love the rice part of the dish. It is so cheesy and creamy, just the way I love everything! The chicken was a tad dry. Next time I might marinate the chicken breasts in chicken broth overnight or use a Kraft Fresh Take mix then bake the chicken. I made four pieces of chicken and wish I would've done more (6-8) Chicken shrinks when cooked, so they ended up half the size as they were when I began! Overall, I am very excited with how this turned out! Took around an hour and fifteen minutes from very start, to when I sat down to eat! 

For more details regarding how I prepared this recipe, or your personnel critic, feel free to email me at dashofsouthern at yahoo dot com !!!


Recipe from Mel @ Mel's Kitchen Cafe


Monday, May 28, 2012

Memorial Day

What is Memorial Day? Well for those of y'all who aren't sure of the exact purpose...
Memorial Day is a federal holiday observed annually in the United States on the last Monday of May. Memorial Day is a day of remembering the men and women who died while serving in the United States Armed Forces. Formerly known as Decoration Day, it originated after the American Civil War to commemorate the fallen Union soldiers of the Civil War. By the 20th century Memorial Day had been extended to honor all Americans who have died in all wars. As a marker it typically marks the start of the summer vacation season, while Labor Day marks its end.


I salute all the selfless people who served in the United States Armed Forces, and anyone else who took part in fighting for/ protecting our country! Thank you for your kind acts to keep America free!!


Here are a few photos from my Memorial weekend...


Nothing beats the smell of meat on the grill, family laughing together, blue skies above High Rock Lake, and some good ole corn hole! And the weekend wouldn't be complete without a sunburn! Hooray for Rachel!


Monday May 28th - Thursday May31st MEAL PLAN!

For some un-thought-of reason, I felt the urge to share with all my readers this weeks meal plan. The Rachael Ray in me is poking through my laziness. I looked up several new recipes, so this week, my nanny "M" & and me will try first hand my new recipes!

Monday Night: Meatloaf with Baked Potatoes 
Tuesday Night: Cheesy Chicken Skillet + Rice/Green beans
Wednesday Night: Homemade Sloppy Joes with Corn on the cob
Thursday Night: Baby Back Ribs with Sweet Potato  Skewers 
Friday Night: Out to dinner with Dad's cash... sounds especially yummy ;)

Have a good week! If any of these recipes interest you, stop by that evening... I will post pictures + recipes to go along with each entree!  


DIY: Bottle Flower Hangers {R=R}


Glad you stopped by to check out what I "refreshed" so I could "reuse!" Today I decided to use Bud Light Platinum beer bottles. Note: I did not drink these! A family friend, who drinks this beer, was nice enough to give them to me once they were empty. She used WD-40 to remove the labels. 


Finished Product

My first step was to find away to use the wire I had handy to create a makeshift hanger. Trial and error was the method I chose because I had no idea what would work. Finally I shoved a knot shaped mess of wire down the neck of the bottle, and it held. So that is what I did on the remaining bottles. I had to use probably a yard, give or take, on this part because the knot used a lot of the wire. Then I clipped some more wire, about 6 inches in length, and wrapped it around the neck. I thought it would add a nice touch, but it is totally optional. 
Next I set out on my four wheeler on a quest for wildflowers! This is what I came up with...


Then you arrange your flowers in your bottle vases. It helps to hold the hook, like it would hang from a tree, while inserting the flowers. If you don't, when you grab the hook, the flowers slide out. 
Now, find a tree!

I intend on using my bottle vases for a backdrop to take photos, but how you use yours is totally up to you!


I hope this project works well for you and you are pleased with your final product, as was I! Feel free to email me with any questions or comments at dashofsouthern@yahoo.com !


Sunday, May 27, 2012

Child to Chic: Bathroom Makeover!

When we first moved into our house Labor Day weekend of 2004, I was seven. And obsessed with cats. Yes, cats. So what more could a seven year old cat lover want than a kitty cat boarder going around her bathroom?

But now as a teenager, nothing could be weirder than having cats starring at you from all angles in your bathroom...

Finally I realized it was time to update my bathroom to something more sophisticated. Grand Hotel Geranium Pink sounded like the right chose in my quest to have a mature bathroom atmosphere...
Dad purchased some Piranha Wallpaper & Paste Remover: Liquid Spray, then squirted it all over the cats, waited ten minutes, squirted again, waited ten minutes, squirted again & began to scrap. The boarder pealed away effortlessly. 

Curious about my paint? Well it's called sponge painting. Starting with a white base, my mom took a sponge, a sponge like you'd see in a fish tank, then got the paint used to paint my room and my sisters room, then sponge the bathroom walls using both the colors! I will miss the sponge paint... just not the cats!

Next comes the paint! 

Lovinggggg the color!
For those of y'all who don't know, this is Bayley! She has been my best friend since 4th grade! Bayley and I would do literally anything to help each other out so she jumped at the  offer to slave over paint rollers with me! 
YAY! Finally!!
I love decorating using things I've made!! 
*decorated the canvas on the wall by hand
**also fully decorated the vase!
Remember the shower curtain hangers I repainted?-Well that's them!

I am utterly thrilled with the outcome of this project! The color is perfect- it reminds me of the Victoria's Secret fitting rooms! So girly. I'll come in there now just to stare at the walls. 

*Sorry for the lateness of this post. I promised I'd have it up Sunday but I apologize for the time I am posting- very, very busy day! 

Hope you all had a blessed and fun Sunday!!